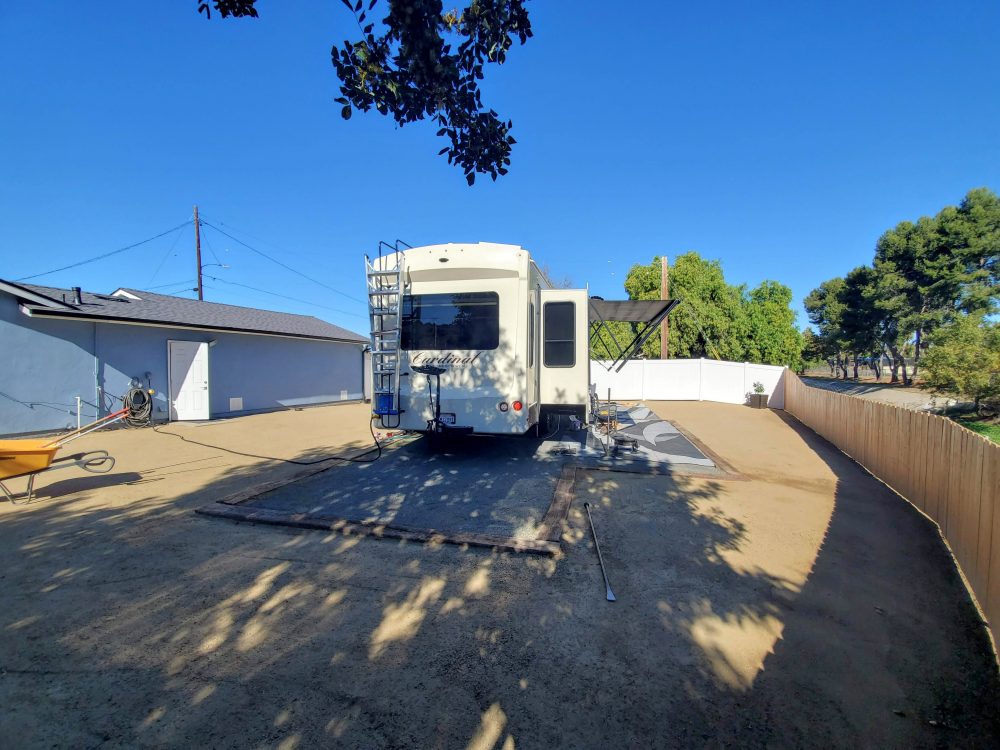
The number one reason to build an RV Pad on your property is so you can store your RV. But, it’s also a great way to add extra space for guest visits.
The main reason we added an RV pad on the side of our son’s house was so that we could visit for weeks at a time, without disrupting their day to day activities. However it’s also a great option to offer when you have visits from family or friends. Even better, it adds value to your home!
What is the total cost to build an RV pad on your property?
We spent a total of $1,550 to build our RV pad. See details below.
If you don’t own an RV you can rent one and have it delivered and set up at your house, if you add a pad, you’ll have a great guest room option for the holidays. We decide to add a pad as well as the full hook ups that really make it convenient. This means power, water, and sewer hook ups which turned our RV storage pad into a vacation rental pad.
When people say, “I’m building an RV Pad on the side of my house”, they are typically referring to a place they can store their RV and get it out of the driveway, or out of an expensive storage lot. But, this set up works great as a guest house for family and friends to visit without interfering in your daily activities. In my humble opinion, all RV owners should consider using an RV for family reunions, holidays, and extended stays for illness and caretaking. Even if it’s rented and parked in your driveway, it works great for all of these purposes.
How we built our full hook-up RV Pad – 3 useful tips:
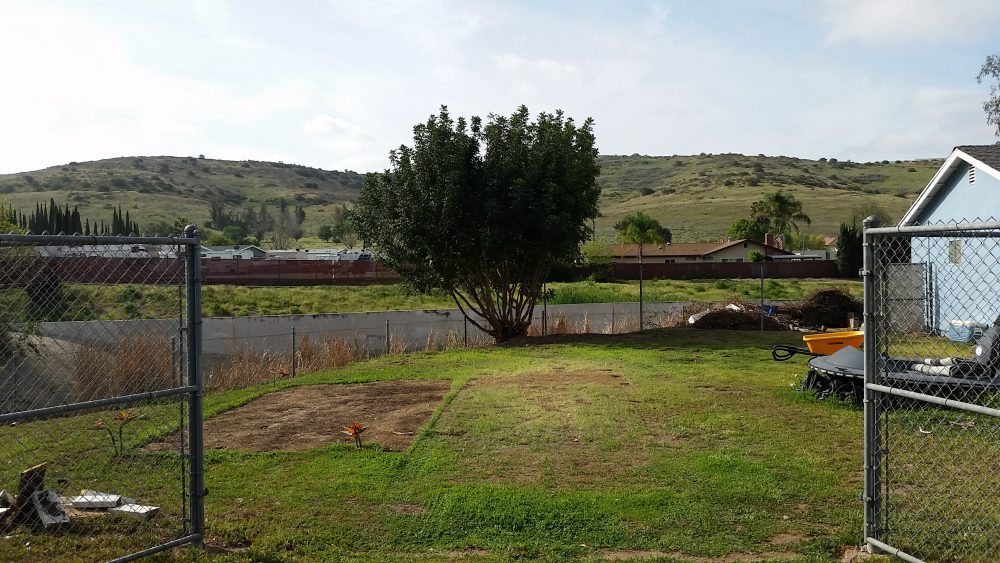 First of all, you have to have the space and luckily, we had
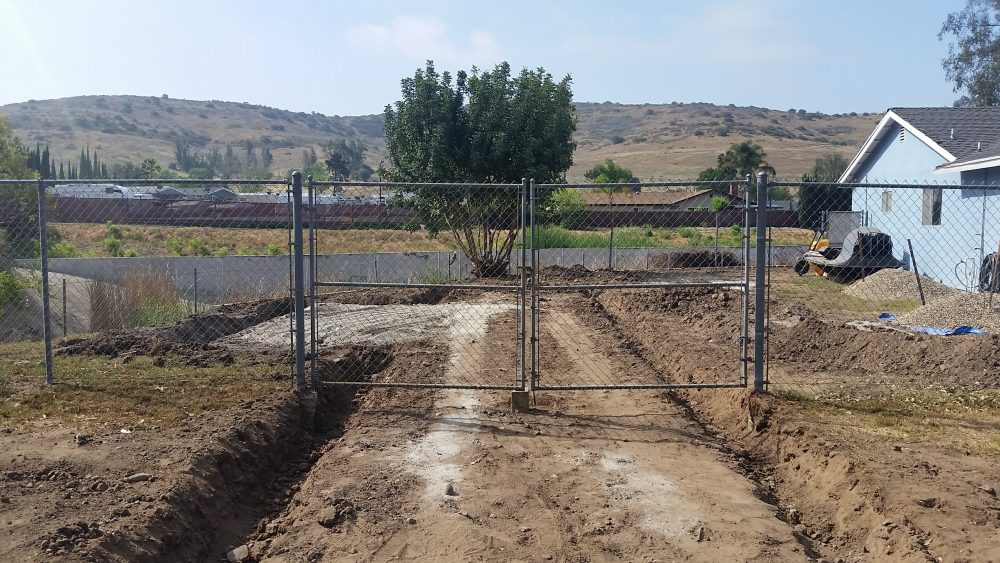
  plenty of that. At 1/3 acre, our son and daughter-in-law’s home bordered a creek and had the perfect amount of empty land on the side of their house with no neighbors to one side. We ended up adding a retaining wall along the creek to get a few extra yards of flat space to build on because we decided to add two pads; one for our rig, and one for future travel trailer which we now use in our RV rental business.
Tip #1 – Clearing and leveling the land – Rent or hire a tractor or bobcat
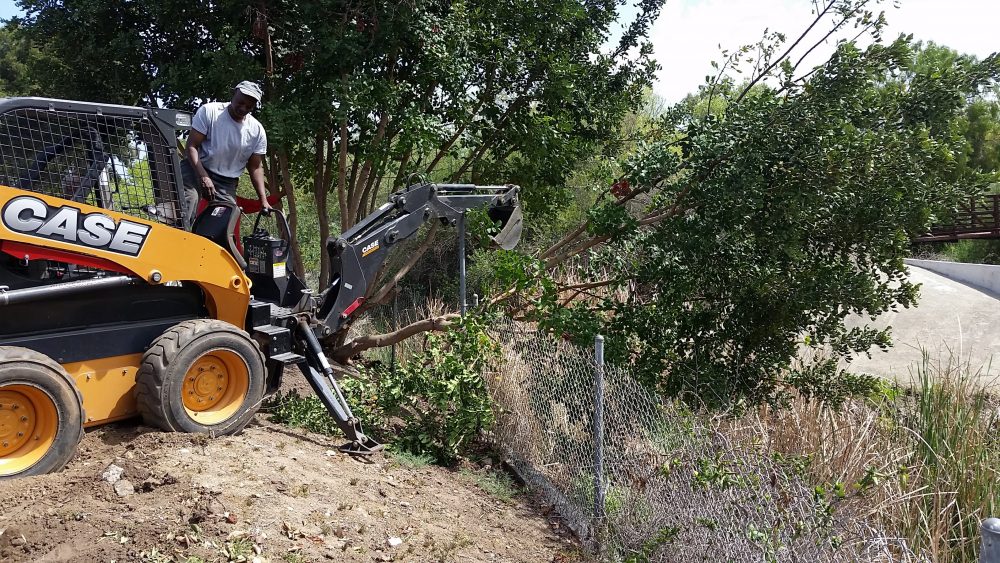 This is back breaking work, and it’s no time to skimp on technology. We used a bobcat to do the spreading, but first we paid a professional to clear the edges of the property taking out all the scrub bushes, roots, rocks, and other old landscaping along the creek. We hired a pro for the day and had just enough daylight to have him to dig a trench for our railroad ties that we used as borders. Figure $500 to $800 per day to hire a professional.
We rented a bobcat for a weekend to do the leveling and spreading work. The cost was around $400 for the weekend and it was well worth it.
Tip #2 – Materials – Road base and DG for the pad. Railroad ties as borders
 Railroad ties are cheap, heavy, and durable. They work great as borders for your DG (decomposed granite) pad material, and you can drive over them without damage. Road base (crushed concrete) is good for keeping weeds down. We laid down a wire mesh barrier to keep out the gophers and squirrels and we had some leftover road base, so we spread that first, and then the DG on top to give us about 3-4 inches of base and material.
After living with the DG for a while, I’d say that the best DG mix should include a mix of variable sized DG. The material needs a range of fine particles up to small sandy pebbles in order to compact into a hard drivable surface. We went for a “looks first” approach and the DG we chose ended being too much gravel, not enough “bind”. So, we end up with a loose gravelly finish, not hard. Still works great and looks great though.
Tip #3 – Do it yourself
 Should you build your own RV pad? The answer is 100% yes If you are physically able and have the time, then DIY. It’s fun and it involves the whole family. After you’re done, you can feel a great sense of accomplishment. If you take nothing else away from this post, take this advice: DO IT YOURSELF (DIY).
Besides learning and having fun, you will save a ton of money. There is no component in the building an RV pad process that the DIY person can’t do. Even the tractor work is possible to do yourself. So, make a plan, set aside the time, budget, watch some YouTube videos, and pull the trigger.
Connecting sewer hook ups for your RV pad
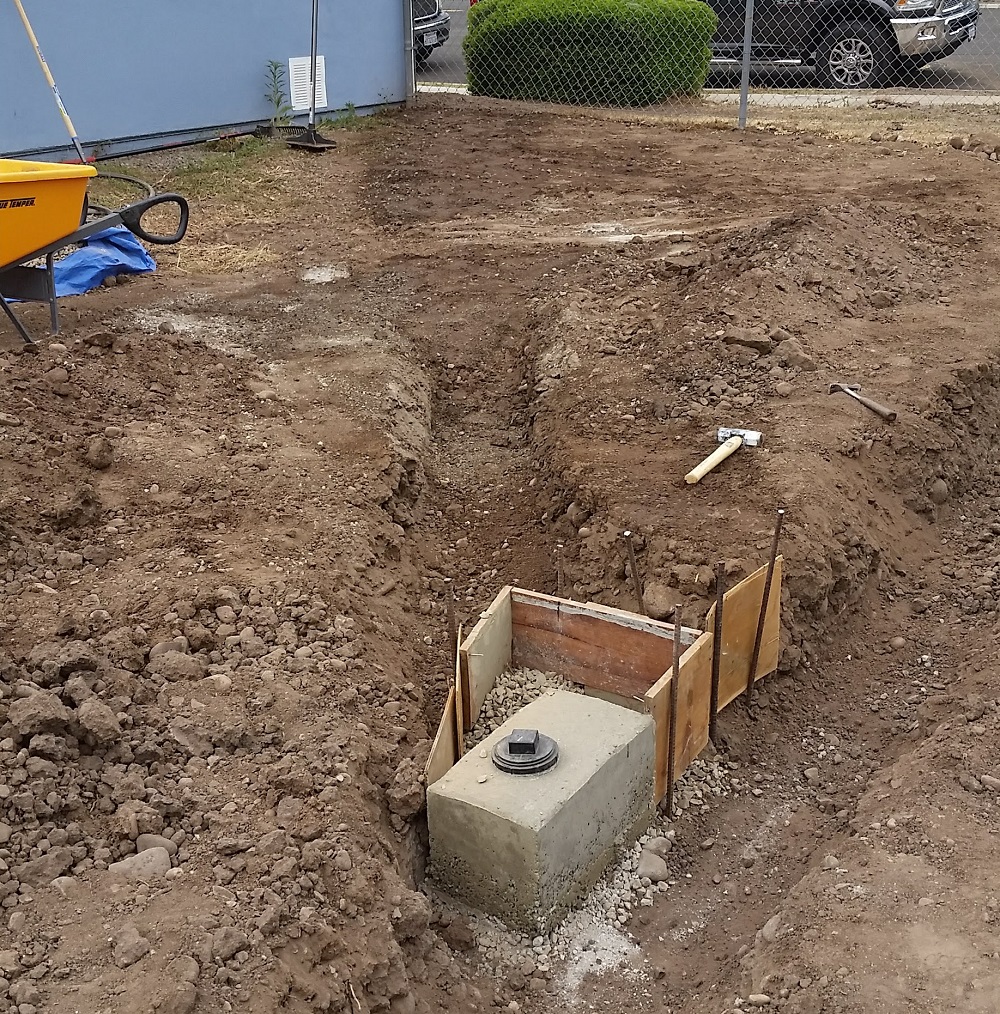 One of the most valuable hook ups of the is the sewer. You’re adding an RV “dump station” that adds a lot of value, for little cost. Most homes have electrical and water available, but not sewer.
Not only is it great for long term guests, but it makes a huge difference if you ever want to rent out your RV. You have a place to empty your tanks after each rental!
Honestly, digging that trench was the 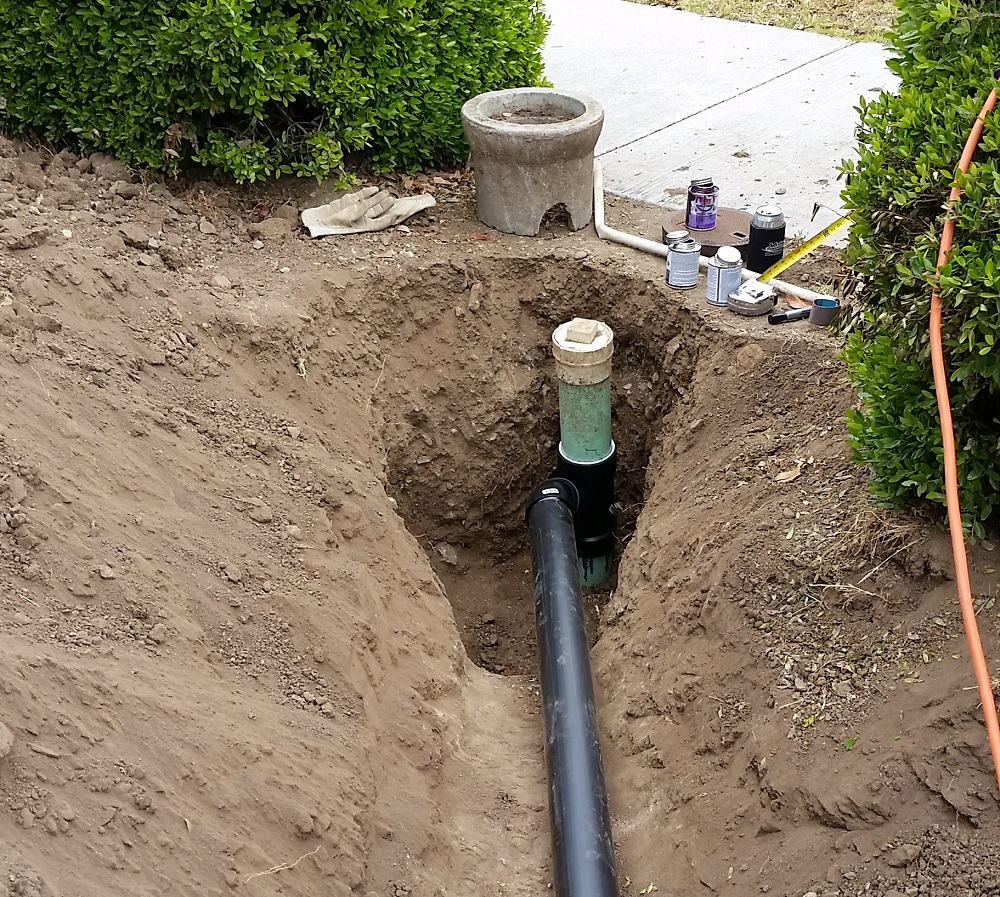 hardest part of the entire project. Hooking up to the sewer main was easy, and so was pouring the concrete for the down pipe. We visit for days, even weeks at a time in our RV at our son’s house and our little sewer spur to the houses main line clean out works like a charm. No issues, knock on wood.
Home RV Pad Electrical Connection
The most intimidating part of our project was hooking up the electrical. We hired an electrician friend to wire from the electrical panel, which is on the other side of the house. We weren’t sure about using an existing 30 amp connection that was there for the dryer. The outlet was disconnected and the wire didn’t appear to be used for  anything. But, how do you know?
The electrician showed us how the testing procedure should go, how to turn off breakers and really do it right. He ended up adding a single 30 amp outlet which we used for a long time before adding a full blown 50 amp box. We watched a few videos and simply connected it. It was easy! Yes, it works and it’s safe. We’ll likely upgrade the electrical box to 200 amp at some point and then run 50, 30, and 20 amp connections to the RV electrical box. For now, we just have 30 amps.
Approximate cost of material:
- DG Material – You’ll need approximately 4 to 5 yards of material for a standard size pad at 3″ deep. Cost – $50 – $80 per yard
- Railroad Ties – You can usually find used RR ties anywhere in the country for an average of $20 each. Figure 9 feet per tie. You’ll need 9 to 12 for an average size pad with a patio cut out like ours.
- Wire Mesh (Optional) – We spent about $100 per roll to cover our pad. No gophers yet, knock on wood.
- ABS and PVC – We spent about $360 on 20 feet of PVC water pipe/fittings, and 4″ ABS for 40 feet of sewer pipe and fittings.
- Electrical wiring and conduit – 50 feet of 10 gauge underground copper wire was about $2/foot. With all the connectors and pipe fittings we spent almost $200.
- 20, 30, 50 Amp Electrical outlet box – We paid $150 for an electrical box on Amazon. It’s high quality and works great.
Hopefully this post will inspire and motivate more home DIY projects that will surely increase your home’s value. If nothing else, you may have learned that you can pull your RV out of storage and save those fees. And, if you get really motivated, List your RV and share it with others. It’s a great way to keep your RV ready for the next trip, and generate a few bucks to pay for it!